
|
Create Mold in three parts: SolidWorks Tutorial
|
Create Mold in three parts: SolidWorks TutorialStep 1 :Open part Step 2 :Make block (in future it will be our mold). In Front plane make sketch. Click the Front plane from the Feature-Manager tree and click the cancel Pencil icon to start a new sketch.First select the middle of the sketch, select center rectangle and draw a box around the sketch. Close the sketch.  Now to make the box: Step 3 :The Extrude Boss/Base command is used to define the characteristic of a 3D linear feature.From the View toolbar above the Command-Manager, click the Trimetric icon. Click the Extrude Boss/Base command from the Features toolbar in the Command-Manager toolbar. Set the following: - Direction: Mid Plane. - Merge Result: un_check. - Click OK . 
Step 4 :Use Combine function (multiple bodies to create a single body).There are three ways to combine multiple solid bodies: Add (Combines solids of all selected bodies to create a single body). Subtract (Removes overlapping material from a selected main body). Common (Removes all material except that which overlaps). So let's start. Click Insert, Features, Combine. Set the following: - Operation Type: Subtract. - Main Body: Click Box. - Bodies to Combine: Click body. - Click OK . 
Step 5 :Use Split functionFrom the View toolbar above the Command-Manager, click the Top icon. Click the Front plane from the Feature-Manager tree and click the Pencil icon to start a sketch. Click Line and draw a two lines.(See Pic first line 6to7 and second line 8to9) Close the sketch.  Step 6 :Click Insert, Features and select Split.Click sign in the design tree and click sketch7.(Whatever the sketch of the lines will be) Then Click "Cut Part". 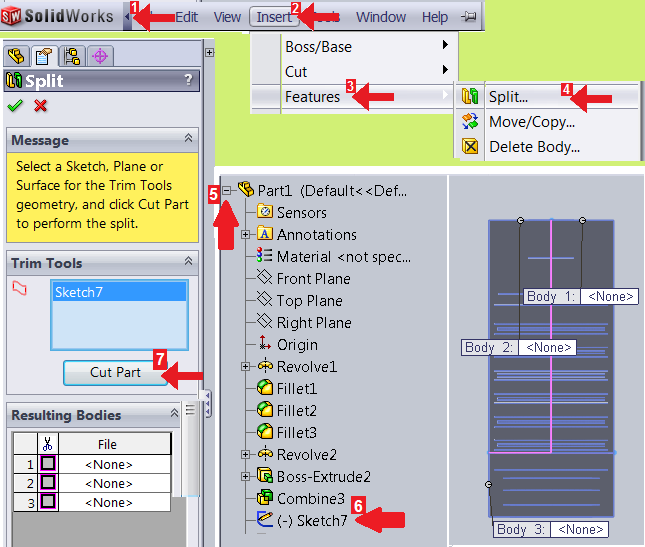 Now after that. The most important work to do now is to save each parts (which are cut). Step 7 :How to save?Double click a body file name. Save the every parts with different names. 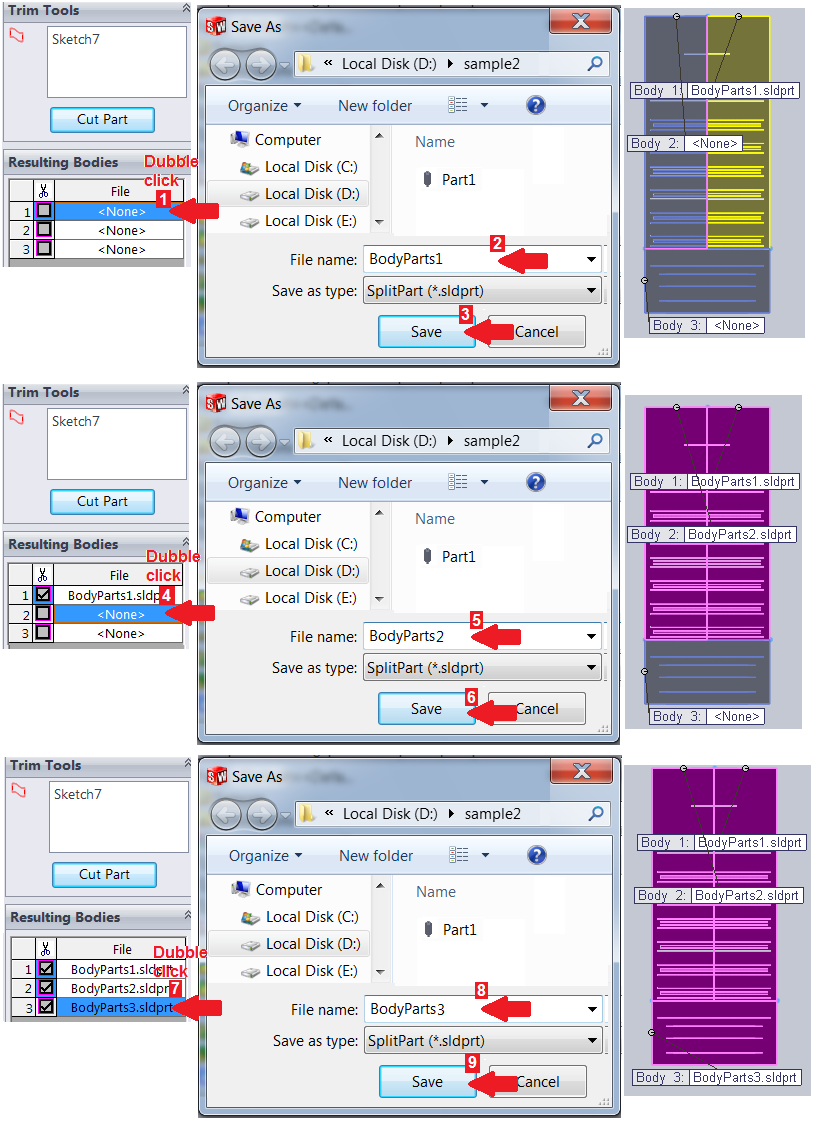 Click OK. 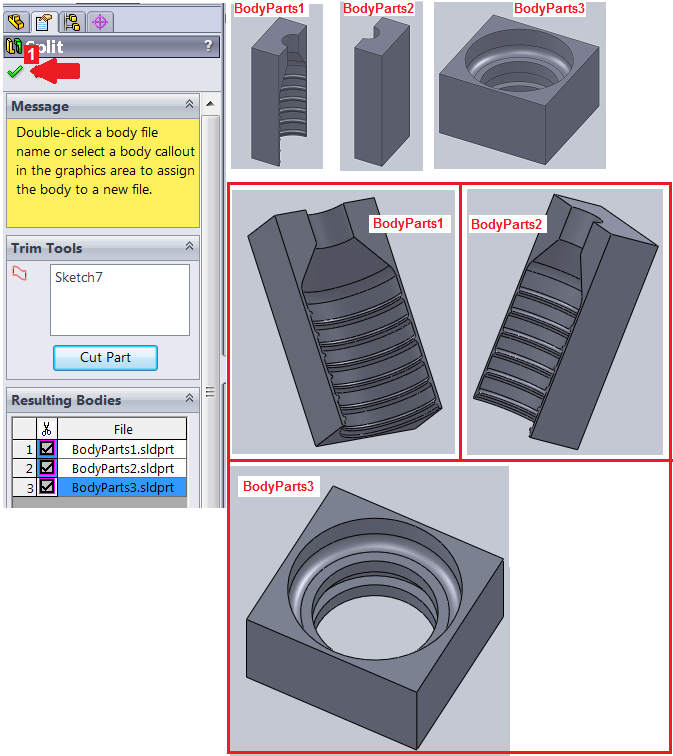 Mold are ready. Thanks. |
|
Share This:
|
Subscribe to:
Posts (Atom)
No comments:
Post a Comment